|
|
|
 |
Starting the fitments |  |
|
Starting work on the fitments |
||
|
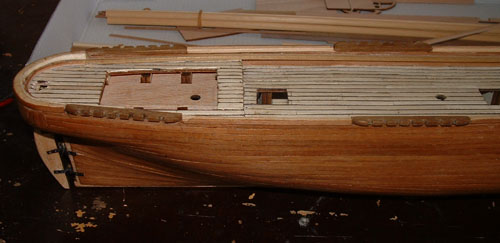
All the internal planking has been completed. The handrail base and belaying pin rails plus the rudder have been added and also the channels have been inserted into the handrail base |
|
|
|
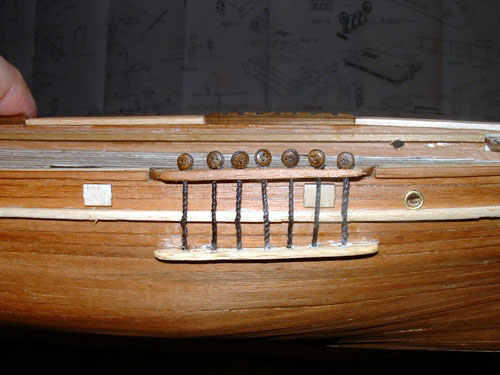
When I started trying to fit the chainplates in the kit I found them to be virtually impossible to assemble as the design was rather poor so I fashioned my own with carpet thread. I brought the thread round the deadeye and then twisted it tight before applying cyanoacrylate, After drying I passed them through the channel down to a lower channel which retains the ends. |
|
|
|
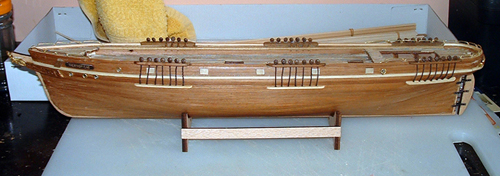
Here we see the entire hull with chainplates fixed showing the effect. Also some of the hull fittings are in place. Portholes and flaps plus the nameplates and bow and stern metalwork. |
|
|
|
This little part, the bowsprit cap, really caused a headache. The instructions told me to take a 1cm length of 6x2mm walnut plank and drill 2x4mm holes in it!! Well, I have to admit I couldn't do it. Then remembering a similar problem I had with the Racehorse I got the wood that the ship parts were attached to and marked out the area with plenty of leeway, drilled the holes and cut out the part. With the extra wood surrounding and also the fact that it is a plywood it made the job simple. |
|
|
|
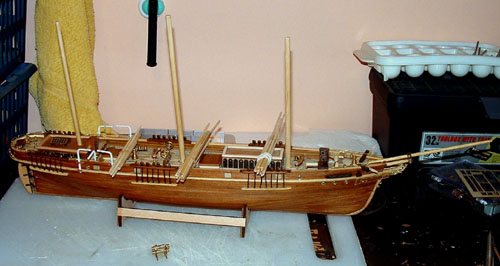
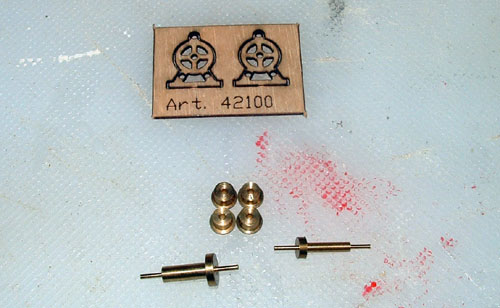
Here the work is proceeding apace. There are still lots of fiddly bits to do on the deck but I am getting there. Also you see the bottom parts of the masts in place with the rest of the masts and stays etc in bundles. I had one real problem with a piece of deck furniture, the Windlass, which you can see at the front. Doesn't look too bad a distance, but up close..... But the Sergal-Mantua suppliers were VERY helpful and sent a replacement kit seen in the next pic with an explanation of the problem. |
|
|
|
What was wrong with the original was that the pins that went through things to hold everything together had not been machined properly and would not fit through the holes in the ends. As you can see there is no leeway there and when I tried to make a job of it I have to say I failed miserably. But thanks to the Sergal-Mantua suppliers I have the kit you see here which fits together perfectly. Thank you for your help. |
|
|
|
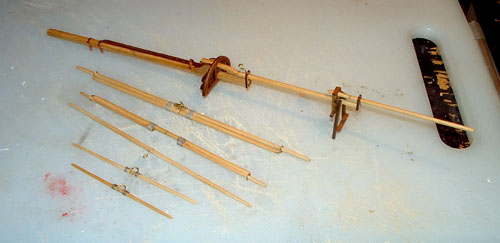
Ok the last picture on this page before we get to grips with the really tricky stuff. Here we see a mast and spars ready for assembly. Quite a few tricky litle bits to make and assemble. Cyanoacrylate was used with an accelerator to just hold them in place before either whipping or nailing the fitting in place. Once the masts are finished we need to start adding the blocks in preparation for rigging. |
|
|
|
|
|
|
|
|
|
|
|
|
|
|