|
|
|
 |
The Rigging |  |
|
Possibly the most daunting part of the build. Especially with a small scale model such as this. The parts on a model such as this are so small they are very difficult to work with and specialised tools for holding them and manipulating the blocks and thread are quite important. Here I will show the adding of the blocks, running rigging and the standing rigging. The blocks are the pieces of wood that the rope ran through and were used as pulleys. The running rigging is that which runs through the blocks and the sailors used to control the sails. The standing rigging is the stuff that doesn't move and the sailors climb up and down and generally hold the masts etc. in place. |
||
|
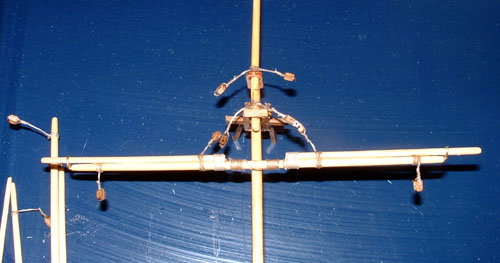
Here we see a mast with blocks fitted. It is best to do this, the first part of rigging, before fitting the mast to the hull. |
|
|
|
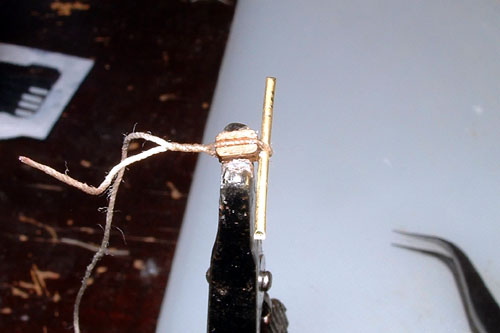
Here is how I set up a block. In the plans it shows the thread above the block whipped into place. I found this to be virtually impossible and in my opinion not worth the effort. I place the block in a crocodile clip. Bring the thread round in the grooves. Place a short length of 1mm brass rod in place if a loop is needed. Apply a small amount of thin cyanoacrylate to the block and thread above taking great care to only get this nasty stuff exactly where you want it. |
|
|
|
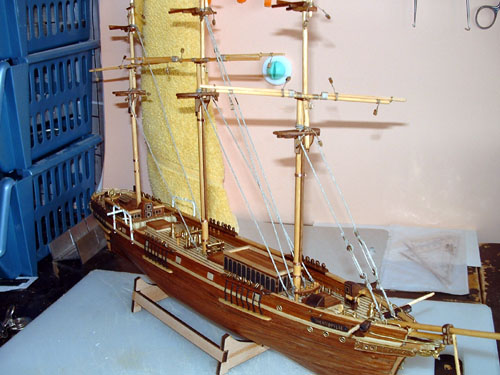
Here is the ship with the masts in place and the main stays rigged |
|
|
|
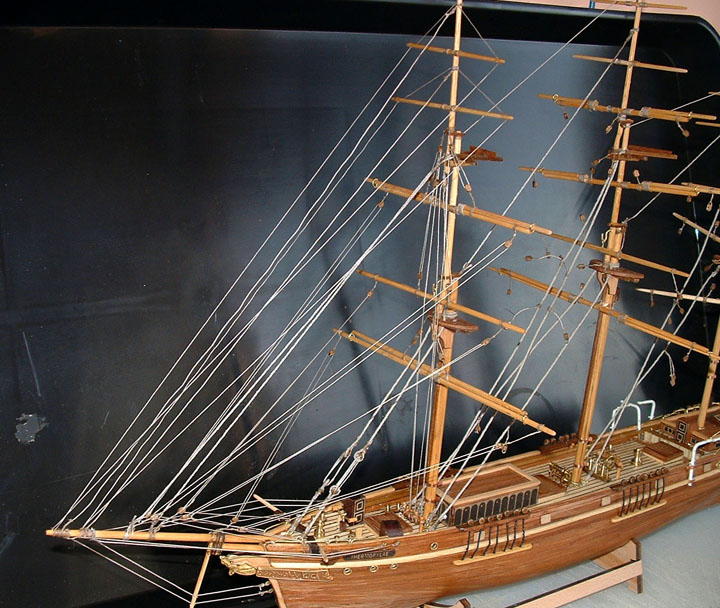
Here we see the bowsprit fully rigged as is the foremast apart from the sheets. It is important to try and get everything the same length so that it looks symmetrical. |
|
|
|
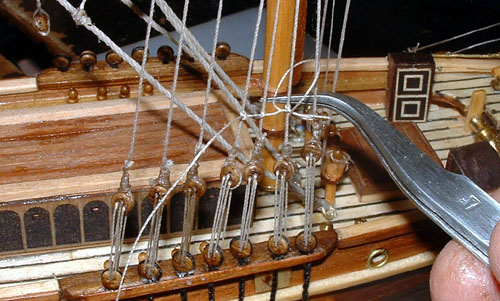
Here you see the ends of one of the forrard mast shrouds. I spent some time trying to get all the deadeyes level and I thought I had! However as you can see the last one is slightly shorter than the rest. I always find this one of the most difficult parts of the rigging. If anyone has any tips on this I would be very happy. |
|
|
|
This is the rigging of a ratline. I consider it necessary to knot each one as it looks so much better than merely gluing them. I know it seems to take forever but it looks so much better. The knot is "Round the front and under - round again and under" Nice and simple!! |
|
|
|
Here I have painted the main bracers and also the shrouds and ratlines I had rigged and then carried on the rigging with black thread. I have also taken off quite a bit of the bracing rigging as after being sent another rigging plan from Steve Priske and looking closely at other models and pictures I have discovered the bracers from the ends of the yards go aft and not forrard as my plan shows. A bit of extra work but it is nice to have it more authentic. |
|
|
|
|
|
|
|
Image |
|
|
|
Image |
|
|