|
|
|
 |
Planking |  |
|
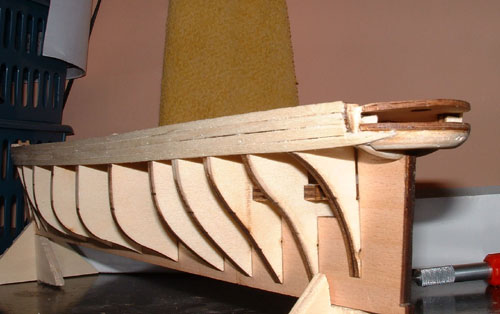
Here we will see the first layer of planking The first layer is 3x1mm lime plank and needs to be a good finish as the second layer is 3x0.5mm walnut and any imperfections in the first layer will be very difficult to cover with the second |
||
|
It is not easy to see in the picture but instead of adhering to the instructions and laying it parallel to the keel I have taken the advice of my e-mail mentor Steve Priske - One of the best tall ship modellers there is - Who advised that I follow the line of the decks. In this particular ship there is no step at all in the top of the hull unlike so many galleon models, so it is important to have a smooth line. Remember that any planking above deck height must NOT be glued to the frames as these will be removed later. Only pin to the frames and apply glue the edges of the planks only. Also don't be overly worried with any slight splits or holes in the planks caused by the pins as this layer can be filled and sanded and then is of course covered later by what must be the perfect layer. |
|
|
|
Work both sides alternately to prevent warping on the hull. We see the top 3 planks sitting straight and coming to an aprupt end where vertical planks will be fitted to shape the upper stern. The fourth plank is curving round using the plank bender to start to give the shape of the stern. One of the difficult parts of this particular model. |
|
|
|
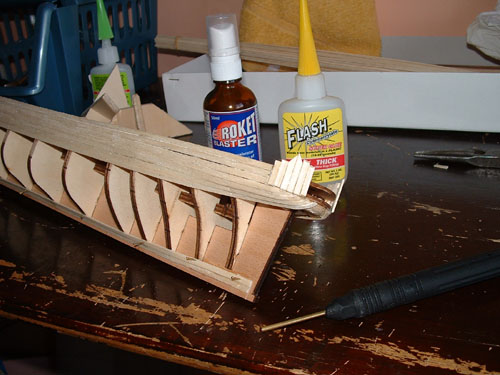
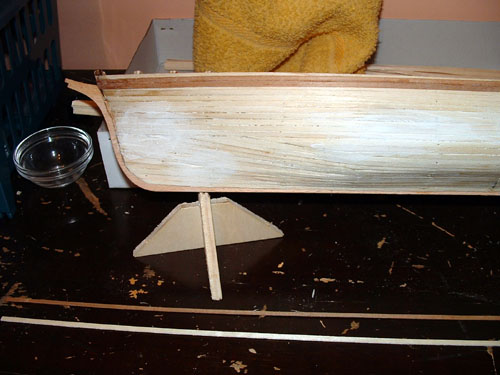
More planks have been laid both sides and you can now clearly see the sweep of the hull towards the stern. I have also laid a couple of planks at the bottom to give a reference point. I personally like to lay the straight bits on the top and bottom, then fill in all the cut planks in the middle. You can also see I have laid a few of the vertical planks on the upper stern. In the picture you can see the nail inserter. IMO if you only buy one piece of specialist kit, this is the one. Well that and a plank bender. The planks are laid using either carpenters glue, where I want a bit of time to adjust, or thick cyanoacrylate. I know a lot of people tend to use the faster glues, but if I need a quicker set I give it a blast of a cyano accelerator, also in the picture. The thick glue is also useful as it tends to fill any unwanted gaps. |
|
|
|
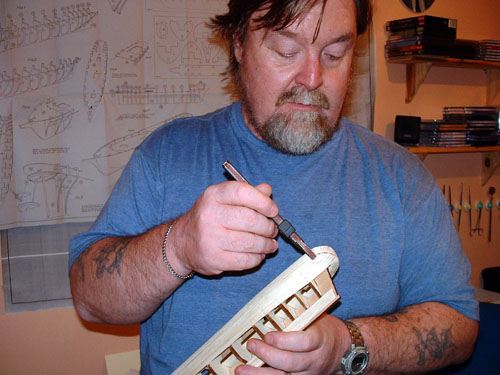
Here you see me smoothing the upper stern planking before starting the central part of the hull where all the cut's will be!! I presume the tool I am using is available everywhere. It is a minature sanding tool that uses a ready-made loop of sandpaper that is turned on the tool as it is used and then replaced when worn. |
|
-->
|
|
We are now at the stage where a lot of cutting and trimming of planks is required. A long keen blade is handy here for by tapping the blade along the cut point with a hammer you can make a clean cut. A craft knife and steel rule can be used if a suitable blade cannot be found and any imperfections sanded. Try not to FORCE the planks to take the shape you want. Far better to let them take the route THEY want to and trim to suit. This will become even more important on the next layer. Accuracy here will save a lot of work later!! |
|
|
|
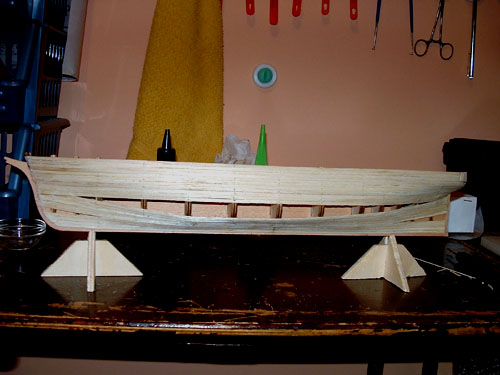
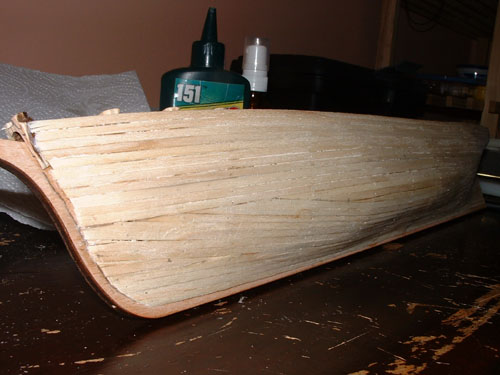
The first layer is finished. It is difficult to see as a camera often makes things look better than they are, especially a flash picture. The surface however is not perfect and work will have to be done on it before laying the 0.5mm second layer |
|
|
|
Here I am again working on the hull. There are 2 types of problems on a hull. Bumps and hollows. Hollows have of course to be filled, using a glue and sawdust mix or a very fine filling paste, followed by sanding. The bumps need to be removed, either by sanding, or in the case of larger ones, scaping. You can go to the expense of purchasing a proper scraper, or even a miniture plane. But a sharp craft knife can be used as a very effective scraper and can remove excess wood from quite small or fairly large areas very successfully! |
|
|
|
Now the hull is mostly prepared and the top layer is started. As you will see the planks are not simply laid over the lower layer but straddle the joint to give added strength. Also remember this layer is the visible one so plan carefully trying to minimise the awkward bits and get a nice flow of the planking lines. We now move on to the next page which will show the second layer being finished and the decks laid |
|
|
|
|
|
|
|
|
|
|